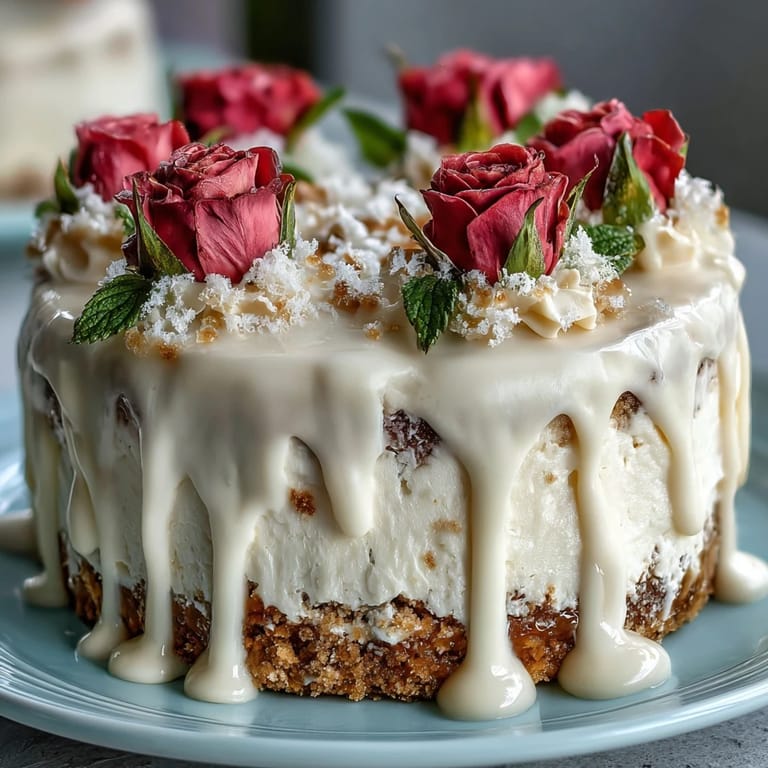
 Pin it
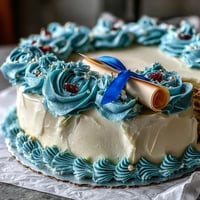
 My friend Sarah's graduation party was supposed to be simple, but then she mentioned offhand that she'd always wanted a cake with piped roses. I'd never attempted them before, but something about the challenge stuck with me. That afternoon, standing in my kitchen with buttercream up to my elbows, I discovered that making roses wasn't about perfection—it was about the rhythm of it, the way your hand learns to move without overthinking. By the time I finished, I had something that looked bakery-worthy, and Sarah actually teared up when she saw it.
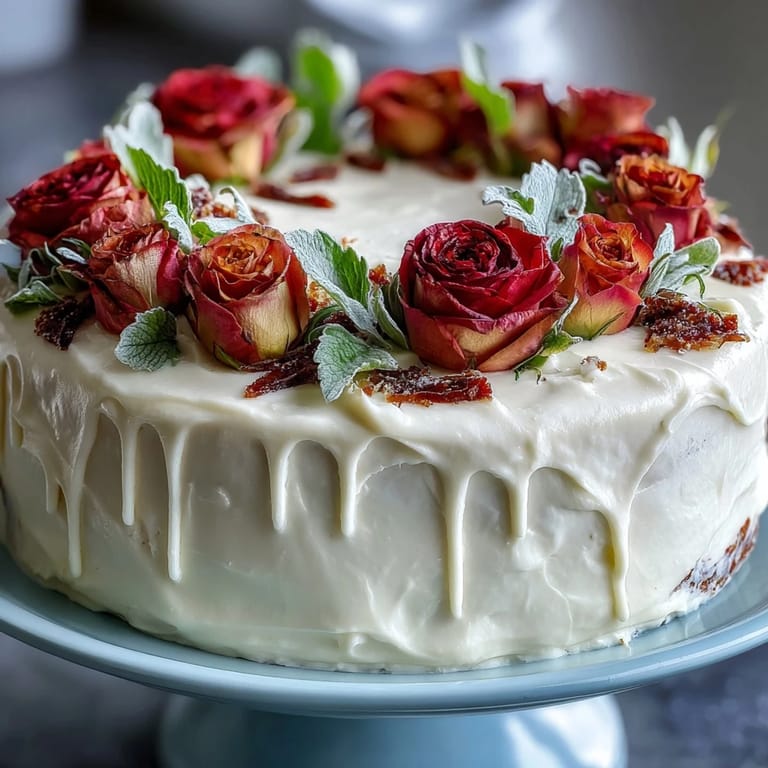
I'll never forget watching my cousin's eyes light up when she walked into her graduation dinner and saw this cake waiting on the dessert table. The room went quiet for just a second, and then everyone crowded around, snapping photos like it belonged in a magazine. She cut into it with her diploma in one hand, and suddenly it wasn't just a cake anymore—it was proof that someone had spent time thinking about making her day special.
Ingredients
- All-purpose flour: Use fresh flour if you can; stale flour absorbs moisture differently and will throw off your cake's texture.
- Baking powder and baking soda: These two work together—don't skip the baking soda just because there's baking powder, or your cake will be dense.
- Unsalted butter: Room temperature is non-negotiable here; cold butter won't cream properly and you'll end up with a grainy crumb.
- Granulated sugar: This sweetens and also helps aerate the batter when creamed with butter, giving the cake that tender, delicate texture.
- Eggs: Room temperature eggs blend smoothly into the batter; cold eggs can cause the mixture to break and become lumpy.
- Vanilla extract: Use real vanilla if your budget allows—it gives the cake a subtle warmth that imitation vanilla can't quite match.
- Whole milk: The fat in whole milk keeps the cake moist; skim milk will make it drier and less forgiving.
- Unsalted butter for buttercream: Same room temperature rule applies; this is what makes the frosting fluffy and spreadable.
- Powdered sugar: Sift it before measuring to avoid lumps that will ruin the smooth finish of your buttercream.
- Gel food coloring: It won't thin out your frosting like liquid coloring does, and the colors stay vibrant without turning muddy.
Tired of Takeout? 🥡
Get 10 meals you can make faster than delivery arrives. Seriously.
One email. No spam. Unsubscribe anytime.
Instructions
- Prepare your pan and heat the oven:
- Preheat to 350°F and line that 12x18-inch pan with parchment paper—grease it first so the paper stays put. This prevents sticking and makes cleanup almost painless.
- Combine your dry ingredients:
- Whisk flour, baking powder, baking soda, and salt together in a medium bowl. You're looking for an even distribution so every bite of cake has consistent rise and structure.
- Cream butter and sugar:
- Beat them together for about 3-4 minutes until the mixture looks pale and fluffy, almost like frosting. This step aerates the batter and is worth the full time.
- Incorporate eggs and vanilla:
- Add eggs one at a time, beating well after each addition so they fully blend in. Then mix in your vanilla extract until the mixture looks smooth and unified.
- Alternate wet and dry:
- Add a bit of flour mixture, then some milk, then more flour, always starting and ending with flour. Overmixing here will develop gluten and make your cake tough, so just stir until combined.
- Bake the cake:
- Pour into the prepared pan and smooth the top, then bake for 30-35 minutes until a toothpick inserted in the center comes out clean. The smell halfway through is absolutely worth staying in the kitchen for.
- Cool completely:
- Let it cool in the pan on a wire rack before you even think about frosting. A warm cake will melt the buttercream, and you'll end up with a sliding mess.
- Make the buttercream:
- Beat softened butter until it's creamy, then gradually add sifted powdered sugar so you don't create a cloud of sugar dust. Add milk and vanilla and beat for about 5 minutes until it's fluffy and smooth.
- Tint your buttercream:
- Divide into bowls and add gel coloring—start with less than you think you need, because the colors deepen as you beat them in. Keep some white for the base layer.
- Crumb coat the cake:
- Spread a thin layer of white buttercream all over the cooled cake to seal in crumbs. This creates a clean canvas for your decorative work.
- Pipe your roses:
- Fit piping bags with petal tips, fill with colored buttercream, and practice on a surface first if you've never done this. Once you find your rhythm, they come together naturally—it's about gentle pressure and a slight twist of your wrist.
- Add leaves and details:
- Use a leaf tip to pipe green leaves around your roses, then add your personalized message with a small round tip. Step back and admire your work; you've just created something genuinely beautiful.
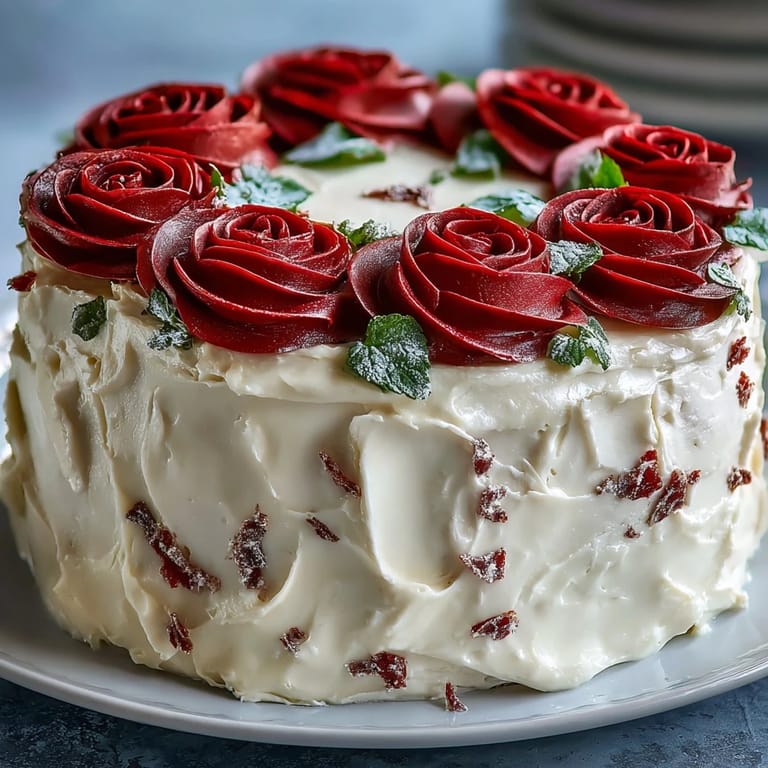 Pin it
 There's something about a homemade decorated cake that hits different than a store-bought one, even if the bakery version might be slightly more polished. When someone knows you spent hours piping those flowers, the gesture becomes part of the gift itself.
The Magic of Room Temperature Ingredients
The first time I skipped letting my ingredients come to room temperature, I thought I was being efficient. I wasn't. The batter came out grainy and uneven, and the final cake had an oddly dense crumb that made me swear I'd follow the rule forever after. Room temperature isn't just a suggestion—it's the difference between silky, tender cake and something that feels slightly off. Everything from eggs to butter to milk blends together smoothly when they're all the same warmth, creating an emulsion that traps air and creates lift.
Why This Cake Works for Big Celebrations
A sheet cake serves 24 people, which means you're not stressed about stacking layers or worrying that it won't feed everyone. The flat surface is actually your friend when it comes to decorating—you have a clean, forgiving canvas. I've made layer cakes that needed architectural support and careful frosting calculations, and every time I come back to sheet cakes for gatherings, I remember why they're the practical choice for celebrations where you want to focus on the moment, not the baking mechanics.
Piping Roses Takes Practice, But Not as Much as You'd Think
The first rose I piped looked vaguely like a deformed peony, but by the tenth one, my hand had figured out the motion. It's not about being an artist—it's about repetition and muscle memory. The petal tip and the slight rotation of your wrist do most of the work. Even if you end up with roses that are a little wonky, there's charm in the handmade quality that a perfectly symmetrical bakery rose somehow lacks.
- Practice on parchment paper or even a plate before you touch the actual cake, so you can get comfortable with the pressure and motion.
- If a rose doesn't look right, just smooth it down and start over—the buttercream is forgiving, and no one will know.
- A border of roses around the edge of the cake is more forgiving than scattered roses in the middle, so start there if you're nervous about your placement.
 Pin it
 This cake has a way of turning an ordinary afternoon into a memory—partly because it tastes genuinely good, and partly because the person you made it for will remember that you went to the effort to learn how to pipe roses just for them. That's the real magic.
Common Questions
- → What type of flour is best for this cake?
All-purpose flour provides the ideal texture and structure for a tender yet sturdy sheet cake.
- → How do I achieve smooth buttercream frosting?
Beat unsalted butter until creamy before gradually adding sifted powdered sugar, milk, and vanilla for a fluffy, smooth consistency.
- → Can I make the colored buttercream vibrant?
Using gel food coloring ensures bright, rich hues without thinning the frosting.
- → How long should the cake cool before decorating?
Allow the cake to cool completely on a wire rack to prevent melting or sliding when applying buttercream decorations.
- → What is the best way to pipe buttercream roses?
Use a petal piping tip and steady hand to create layered petals, starting from the center and moving outward.
- → Can this cake be stored?
Store covered at room temperature for up to 2 days or refrigerate up to 5 days to maintain freshness.